Configuring the NAS
On the NAS, we will set up a user called mari, and a home directory (share
) for that user.
Let's assume you've got the NAS on your home network, with IP address
192.168.0.15.
In a web browser navigate to http://192.168.0.15 and log in as admin.
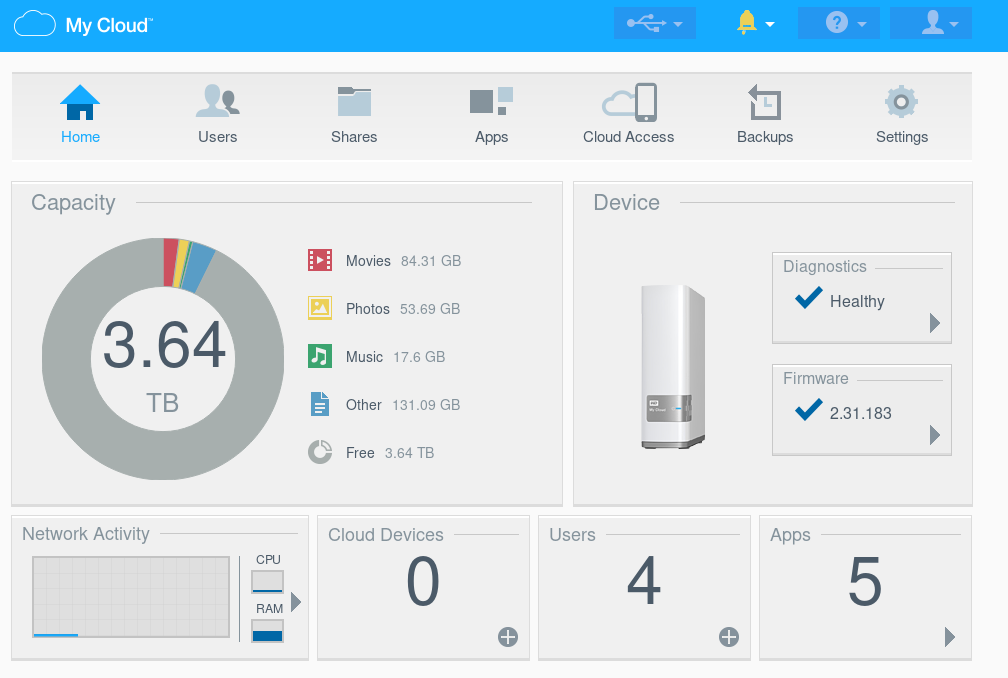
You will reach the NAS home page
From here, we want to create a user called mari and give them access to a share also called mari. We create and configure users and shares via the "Users" and "Shares" tabs at the top of the page.
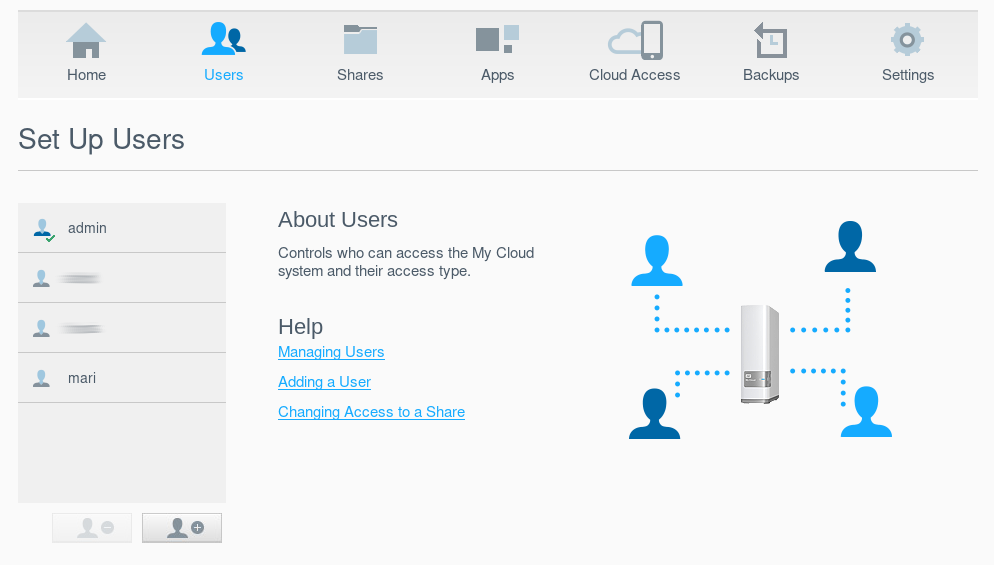
First you click on the "Users" tab to get to the Users home page.
Then click on the  icon under the list of user names, and create
a new user called mari.
icon under the list of user names, and create
a new user called mari.
Then the Users home page will look like this:
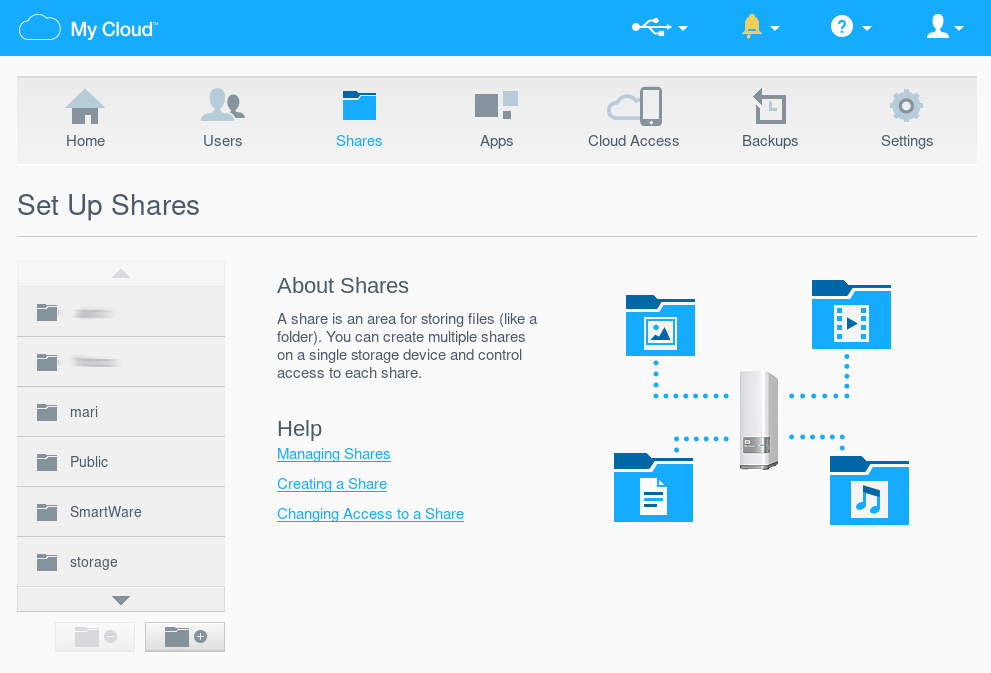
Now click on the Shares tab to bring up the Shares home page.
Click on the  icon under the list of shares, and create
a new share called mari.
icon under the list of shares, and create
a new share called mari.
Then the Shares home page will look like this:
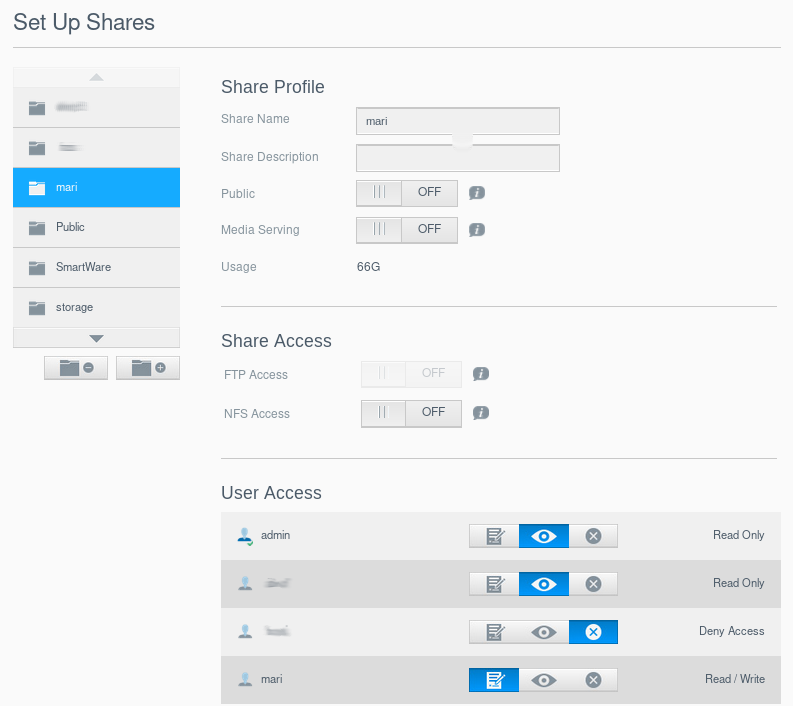
Click on the mari share in the list down the left side of the page, and you get to its configuration page. Go down to the "User Access" part and make sure that the user mari has Read/Write access to the mari share.
The page should then look like this
Now go back to the "Users" tab, click on user mari, and you get the config page for that user.
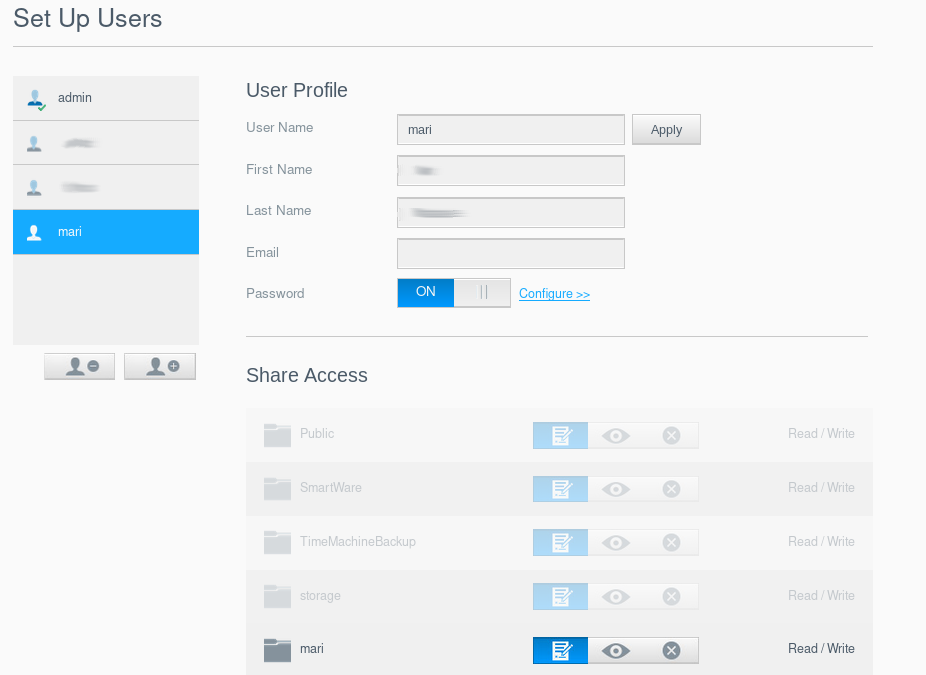
Make sure that the user mari has Read/Write access to the mari share.
The NAS is now ready to accept backups from a Linux computer on the home network.
Mounting the NAS share over the network
We want to be able to back up the /home/mari/ directory on our Linux computer to the NAS. This will be easy if we set up the NAS's mari share so that it looks like a writeable directory on the Linux computer.On the Linux computer,
- Create a local mountpoint, called
/backup
, for the NAS's mari share:sudo mkdir /backup
- Add a line to the /etc/fstab file, telling the computer that when mounting /backup it should map it over the network to the mari share on the NAS (identified by it's IP address, 192.168.0.15).
Add this line to /etc/fstab//192.168.0.15/mari /backup cifs users,noauto,uid=mari,gid=mari,username=mari,password=XXX,file_mode=0644,dir_mode=0755 0 0
Note that for the uid and gid the username needs to be a real user on the Linux system.-
If you want to test that the mount will work before editing /etc/fstab, you can use this command
sudo mount -t cifs //192.168.0.15/mari --verbose -o rw,uid=mari,gid=mari,username=mari,file_mode=0644,dir_mode=0755 /backup
mount /backup
and /backup will then, for all practical purposes, be the mari share on the NAS, accessed from your Linux computer. Then you should be able to navigate to the /backup directory and see the files there (which are actually the files in the mari share on the NAS) and you should be able to create new files there. -
If you want to test that the mount will work before editing /etc/fstab, you can use this command
- As you saw in the mounting options, we will access the NAS's filesystem using the Common Internet File System (CIFS) protocol. To ensure that ordinary users can mount remote filesystems this way, we need to set the protections on the mounting command
sudo chmod u+s /sbin/mount.cifs
This allows ordinary users to mount CIFS filesystems.
Using rsync to save backups on the NAS
The rsync command provides a simple way of mirroring your home directory to another directory. To backup the /home/mari directory to its mirror on the NAS you just need to mount the NAS share and then use rsync:
mount /backup
rsync -r --progress --times --delete --safe-links --exclude-from=${rsync_exclusions_file} /home/mari/ /backup
The --exclude from=...parameter is optional but useful. ${rsync_exclusions_file} is the name of a file that tells rsync what directories to skip (e.g. because they are large but not important, or because they should exist on the NAS but not in your home directory; e.g. the rsync backup directory, where all previous increments of backups are preserved). So, for example, the file might look like this:
/.cache
/.config
/.kde
/.local
/.mozilla
/rsync_backup
/.wine
Note that there should be one directory per line, with no trailing spaces between the directory name and the end of the line.
For daily automated backups you need to embed this command in a script that contains additional functionality:
- checking to see if the the NAS share got mounted properly
- historical backup: rsync mirrors the home directory to the NAS, but when it writes a new version of a file we don't just clobber the old version: we keep it in a historical record so we can later retrieve any file that was ever backed up to the NAS
- reporting any rsync errors in human-readable form
- logging of backups to a logfile in the user's home directory
Automate daily backups to the NAS
Create a file in /etc/cron.daily/ with a suitable name like mari_backup_to_NAS:#!/bin/sh runuser -u mari /home/mari/bin/backup_to_NAS exit $?
Retrieving files from the backup
To access the backups, first mount the NAS share
mount /backup
then if you navigate to it using the file browser (or just cd /backup at the command line) you will find yourself in a copy of the mari home directory that was refreshed when the last backup was done. You can copy files from there to /home/mari. This is how you would restore a file that you deleted by mistake after the last backup was done.
If you want to get back something that you deleted a while ago, there is a historic record of backed up files in /backup/rsync_backup. For example, if you navigate to /backup/rsync_backup/2019-04-15 then you will find copies of all files that were replaced (modified or deleted) in the backup that was done on that date.
If you want to search the historic backups for a file whose name you know, or partly know, you can use the find command. For example, if you want to find any file with "revised" in its name,
find /backup/rsync_backup -iname *revised* -print
This will print out a list of all files containing the string "revised" in the current backup or in the historical backups.